Art of BI: Setting up OBIEE Impersonate – BITeamwork Updating Impersonate Credentials for BITeamwork OBIEE WS Service Account
Author: Christian Screen | 3 min read | July 4, 2015
BITeamwork makes use of the OBIEE API system and web service calls for part of the functionality it delivers to empower OBIEE users. A OBIEE service account for accessing the API must be created and then using the BITeamwork control panel those credentials are securely entered and encrypted to be leveraged by BITeamwork. That credential needs not have access to any data or reports, merely the impersonate user and SOAP access privileges. We often recommend customers use a default user for setting up this credential such as the administrator user created when OBIEE was originally installed. We typically set that user’s name as “weblogic” but we know other customers use “biadmin” or something equally as clever.
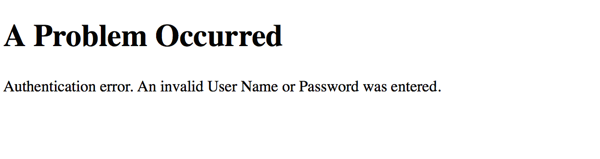
At any rate, that user or the application role it is assigned, such as the BIAdministrator role, must have the impersonateUser privilege assigned to it via Enterprise Manager’s privilege security management. This post walks you through how to achieve the desired result of adding the impersonate user privilege to an application role with which a user assigned as the web service service account will be associated. Please ping our support team if you need any assistance. If this is not configured for the Advanced Printing option now in OBIEE via BITeamwork you may receive the following error message:

Follow the steps below to ensure that you receive no error messages. These steps are also very general to setting up privileges for Application Roles in OBIEE 11g:
1. Open Enterprise Manager
2. Expand the Business Intelligence Folder
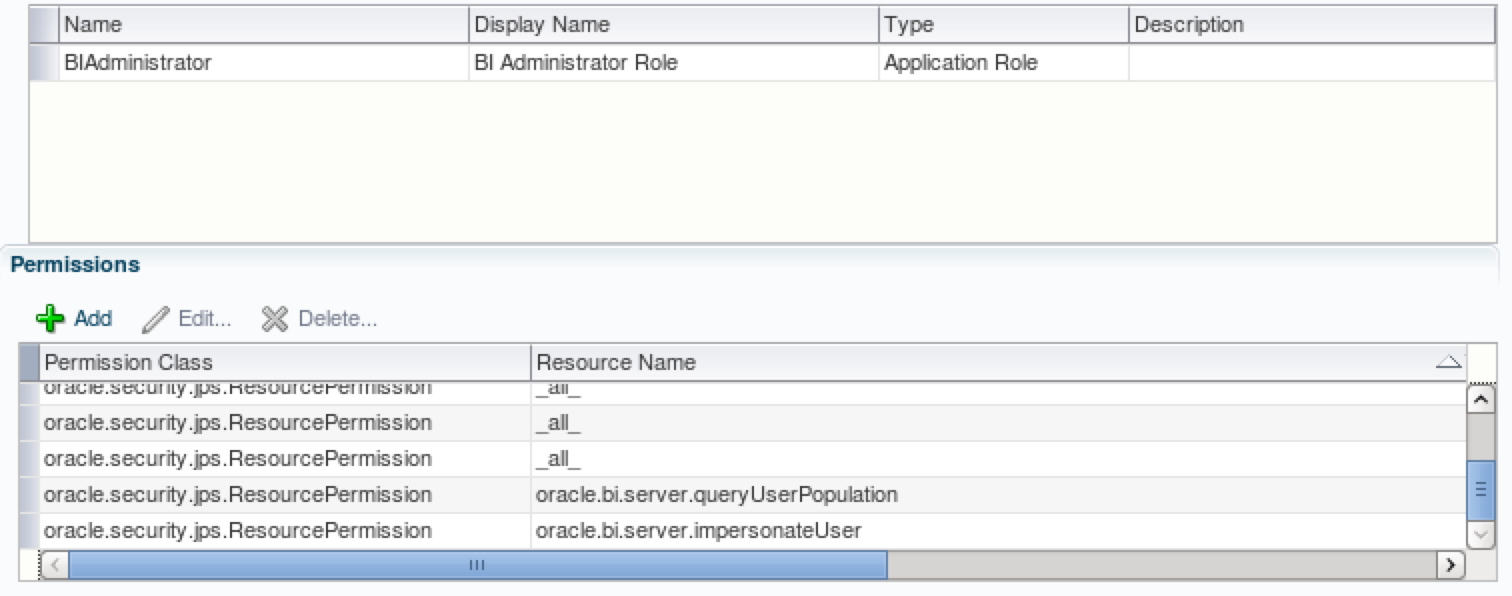
3. Right click on the Business Intelligence folder and select Security > Application Policies
4. Click on the row of the BIAdministrator role (or whatever other role your OBIEE WS Service Account, ex: weblogic, obiadmin, etc., is assigned) in order to select it
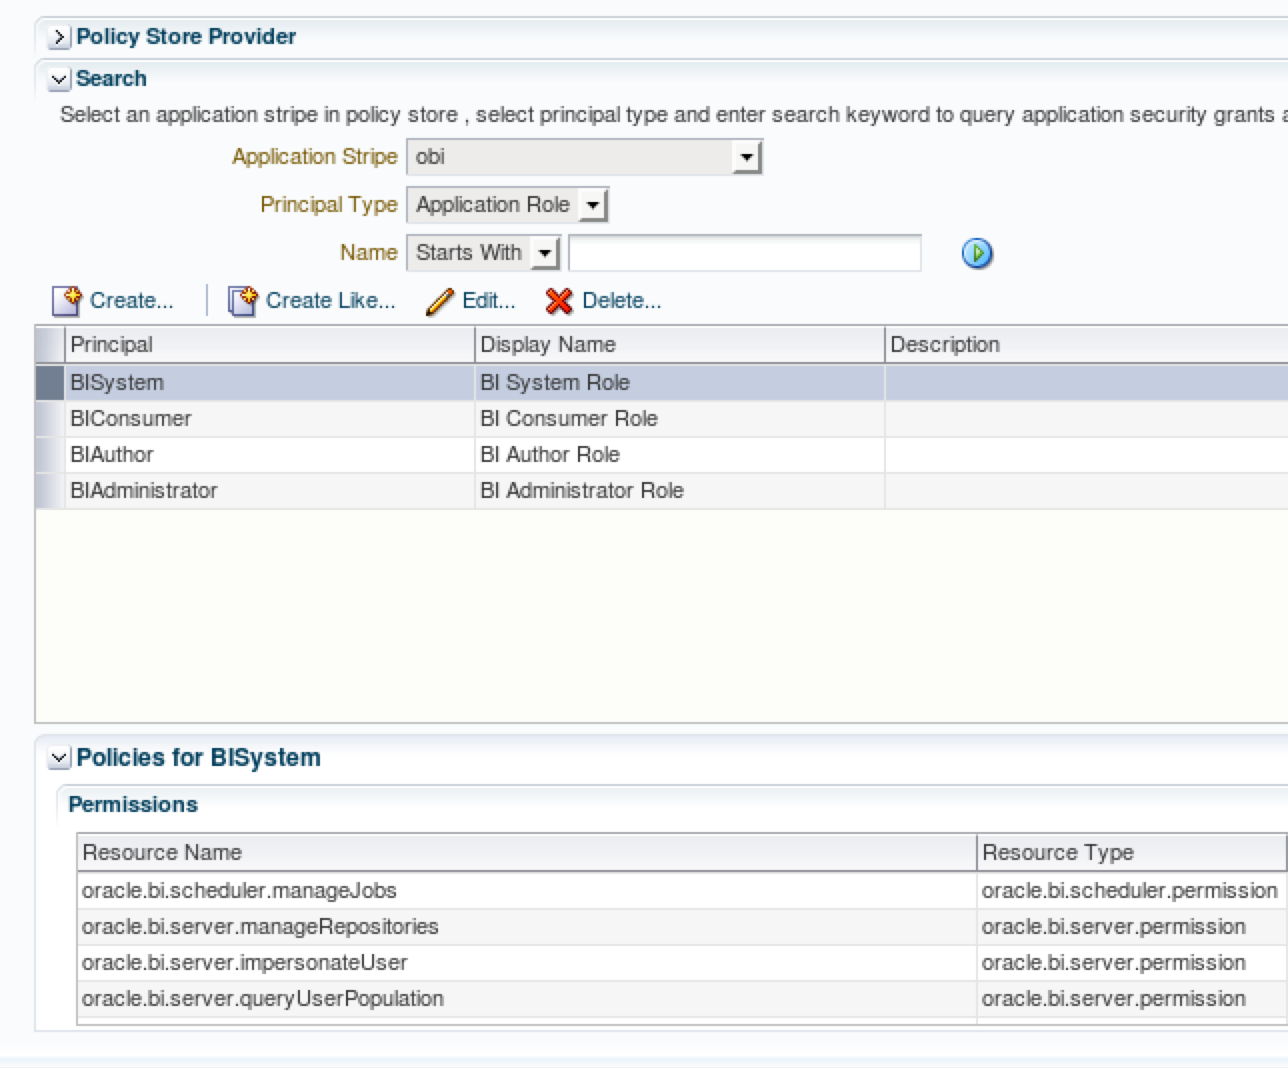
5. Click on the pencil icon button to edit the privileges for this role
6. In the Permissions table (bottom of page) click the green plus “Add” icon button to open the Add Permission dialog window
7. Ensure that:
- Permissions option is selected
- Permission Class is oracle.security.jps.ResourcePermission
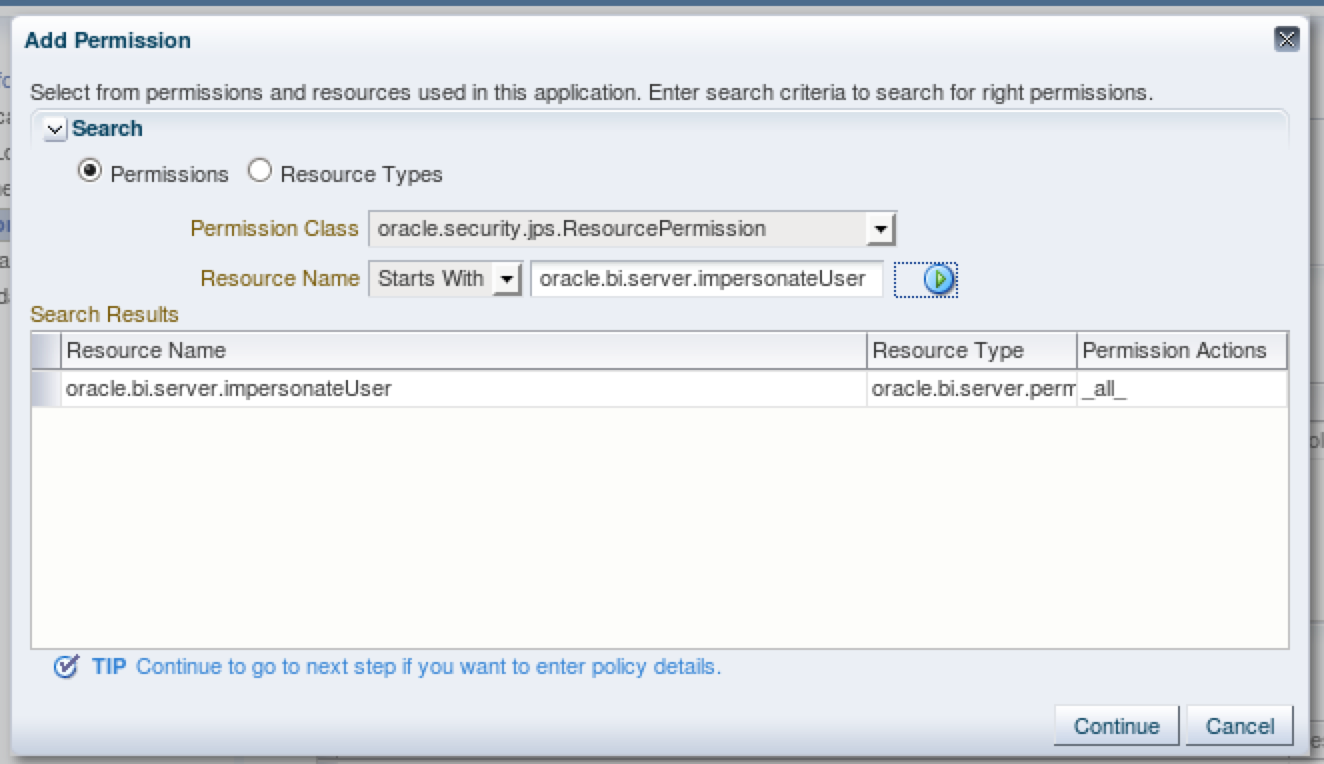
8. Enter oracle.bi.server.impersonateUser in the Resource Name field and then click the triangle play button to search for the resource.

9. Click on the row in the Search Results table for the Resource Name entry. (Not selecting or clicking on the row before conducting the next step will result in failure of adding his new permission)
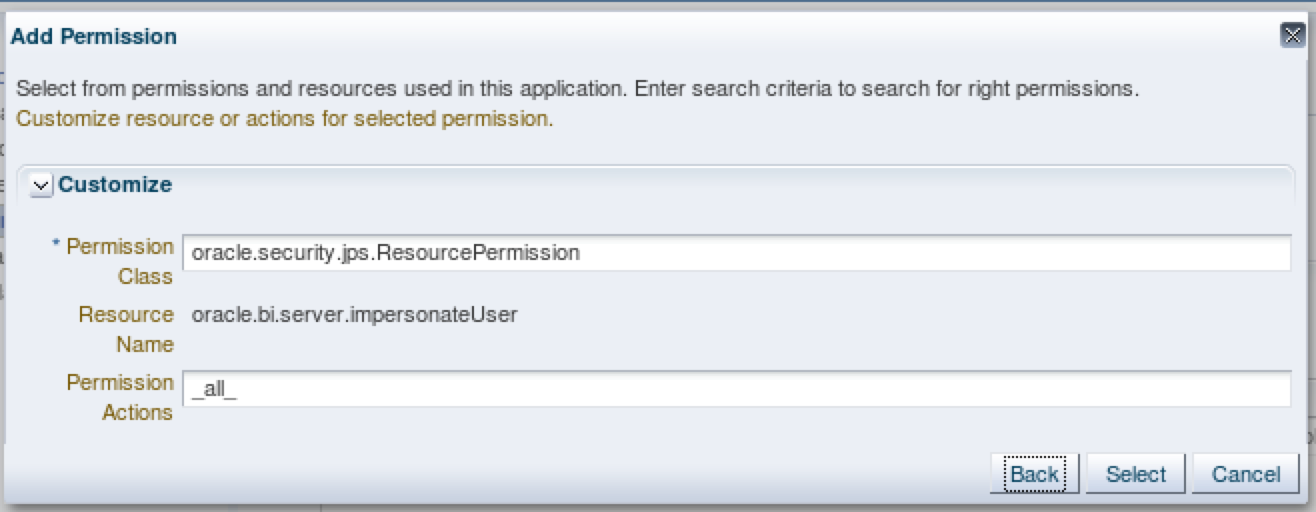
10. Click the Continue button
11. Click the Select button to confirm the filled in form
12. Click the OK button on the returned page
13. If working with BITeamwork, and testing the Advanced Printing option,Return to the OBIEE dashboard and run the Advanced Printing option in OBIEE using the Dashboard Options menu. This should now work for any user with access to the advanced printing option.